Note
for us: These is a list of ideas for a starting an acquisition I would like to add.
Get to know the acquisition workflow
adjusting the camera configuration
adjusting the PowerLab configuration
adjusting the pacer configuration
other?
Example acquisition
Before you start, make sure you have initiated the setup as describe in the Starting the set-up tutorial.
Here is an schematics on how the acquisition workflows works in a regular setting:
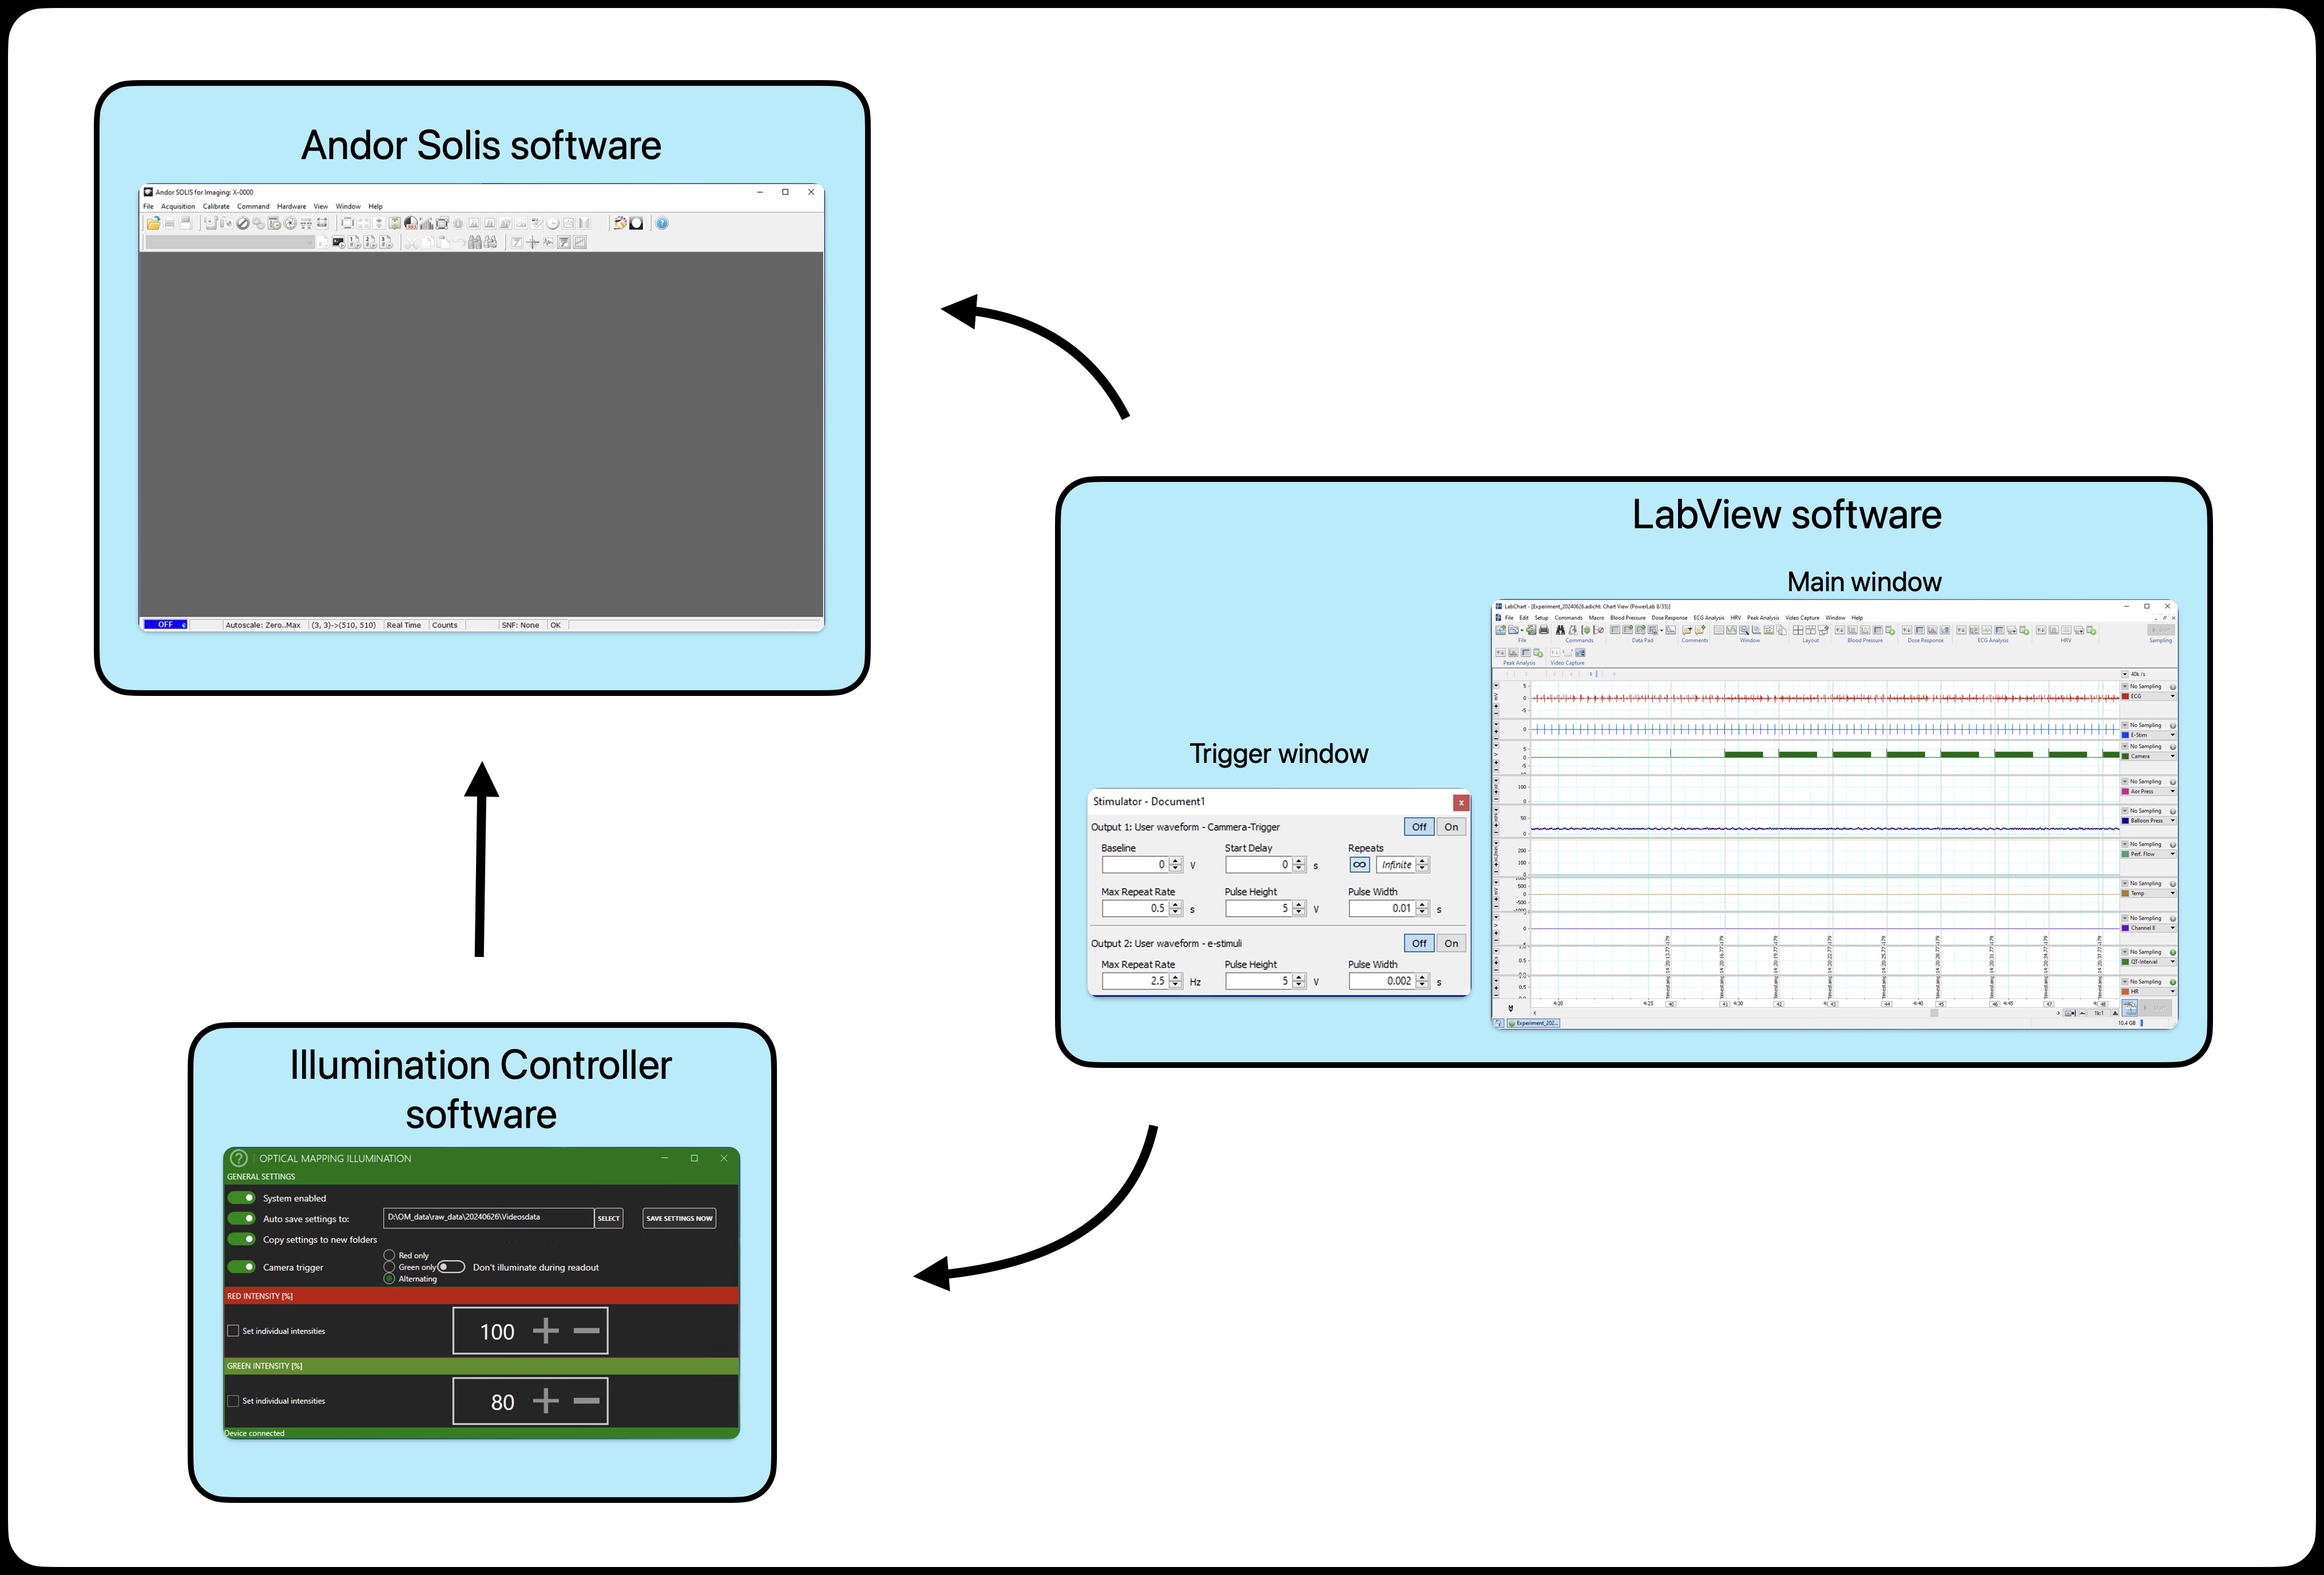
The LabView is configured to trigger the camera on and pacer via the trigger window. There are two trigger options: the camera trigger (upper one) and the e-stimuli trigger (lower one). Turning on the trigger will send the signal to each device respectively. See bellow the example for details.
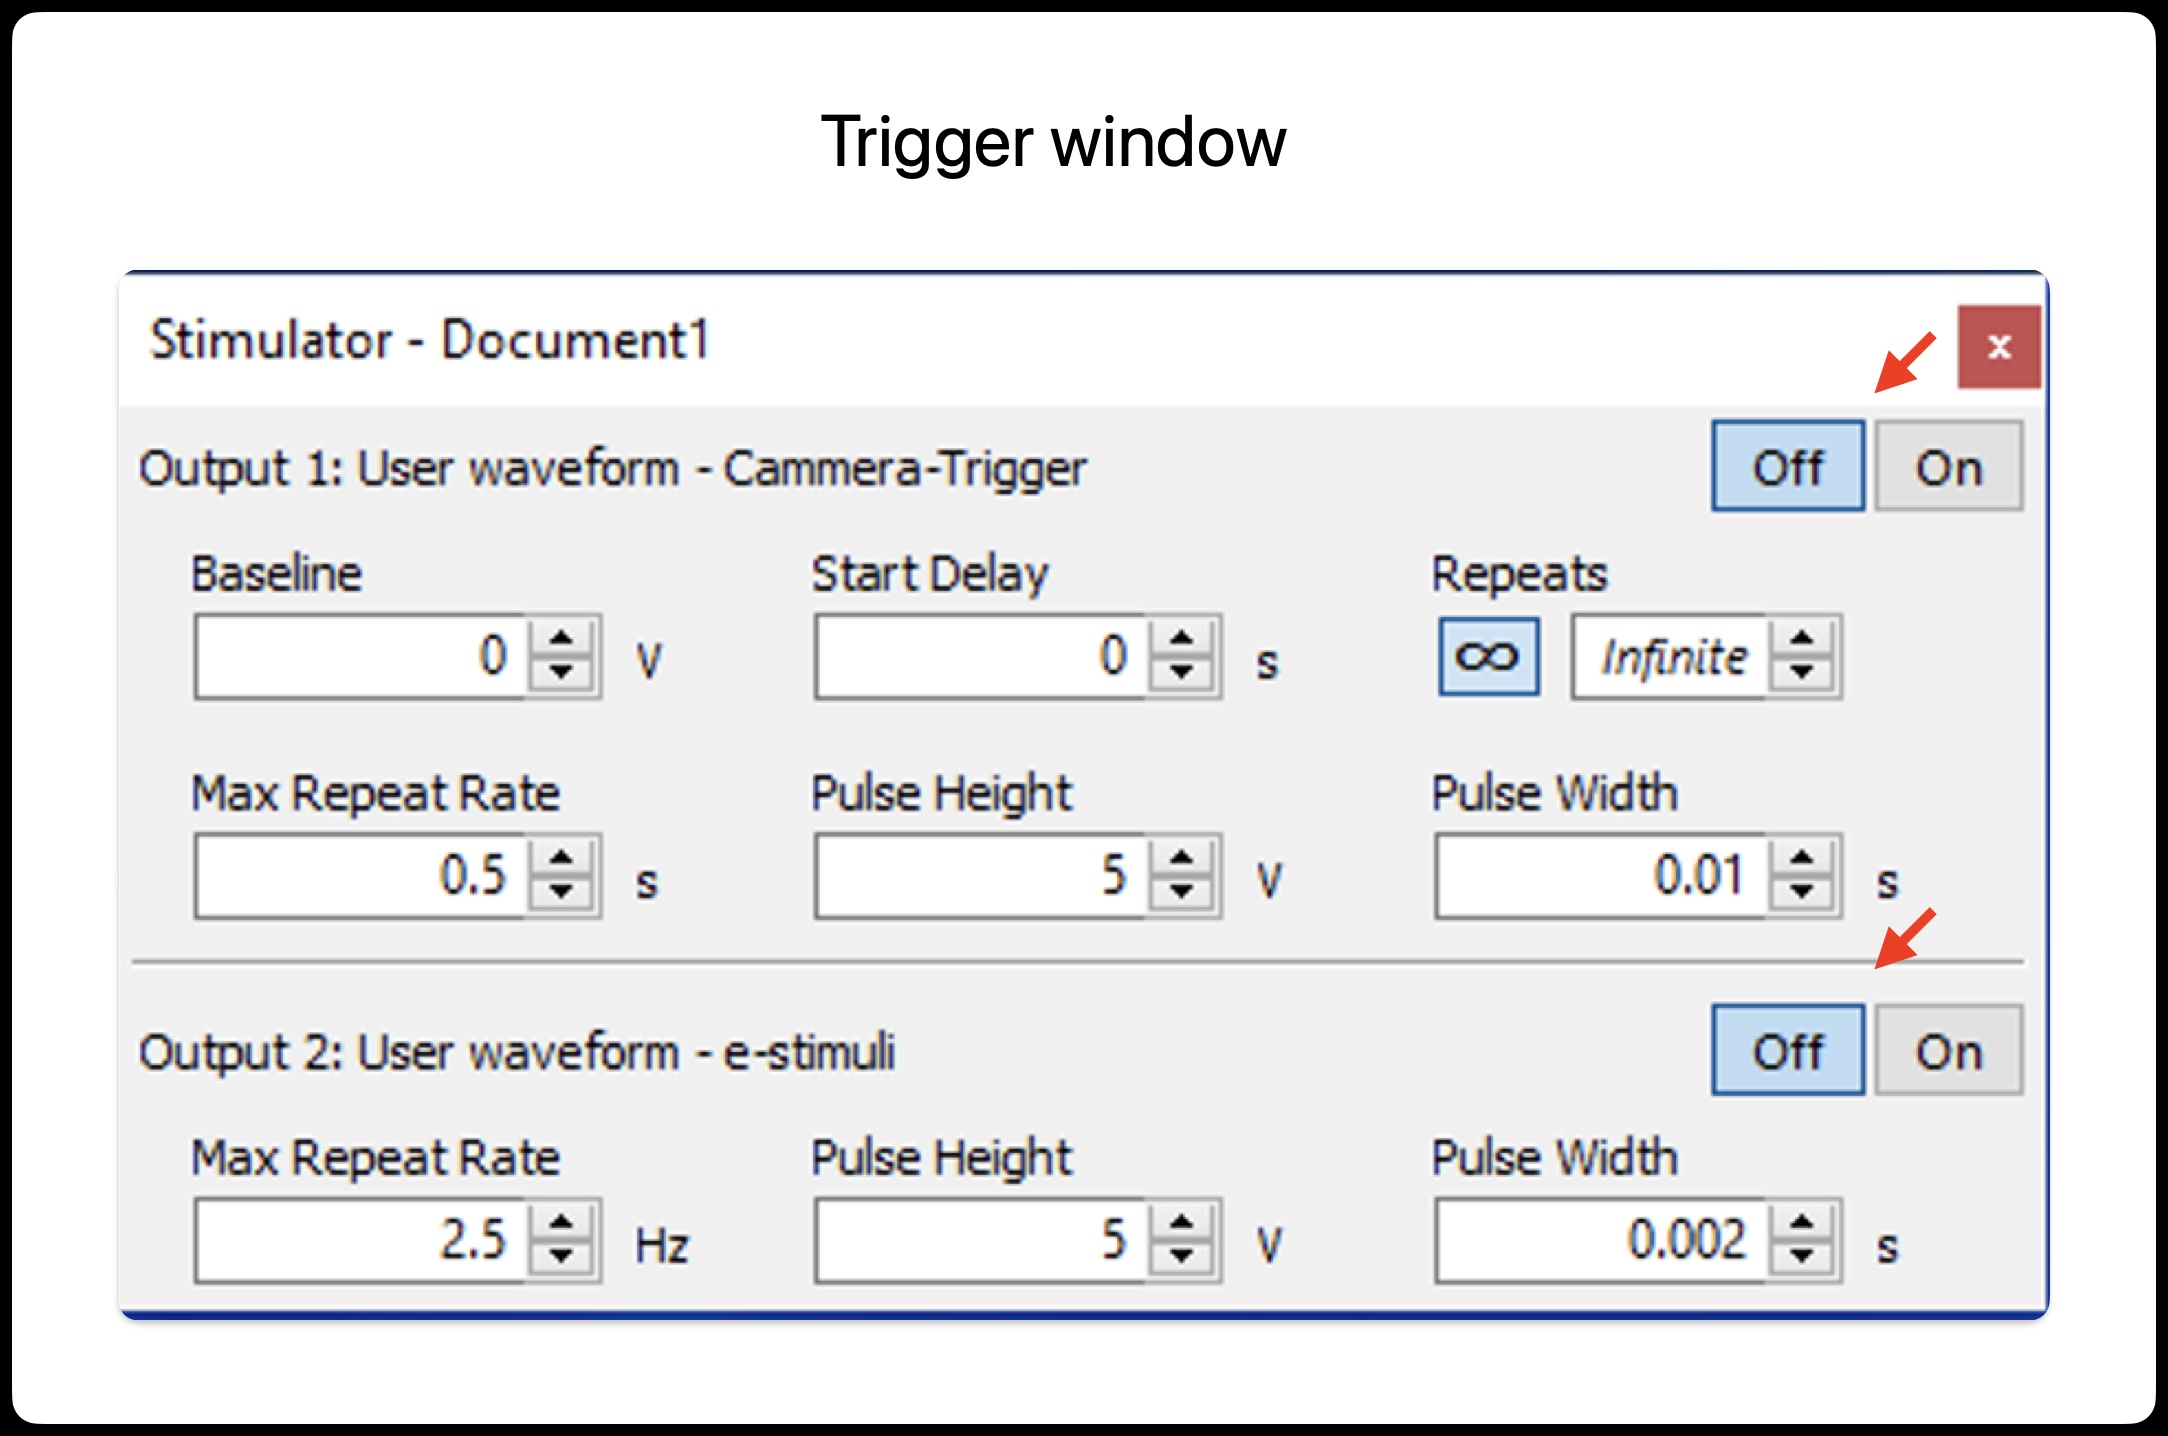
In this example the trigger will send a “free run” signal to the camera every 0.5 s (2 Hz).
Similarly, the trigger will send a signal to the e-estimulator at 2.5 Hz (every 400 ms). In orther to use this option, make sure that the pacer has been configured to mode: TRIGGERED.
Note that the pacer when operated in this way, the external e-stimuli trigger only control the frequency of the signal. Pay attention that no amplitude of the e-pacer is controlled via the LabView/PowerLab. In orther to change the voltage apmplitude of the stimuli you must set it manually on the e-pacer apparatus.
Attention!
The e-stimuli trigger does not control the amplitude (voltage) of the signal only the frequency!.
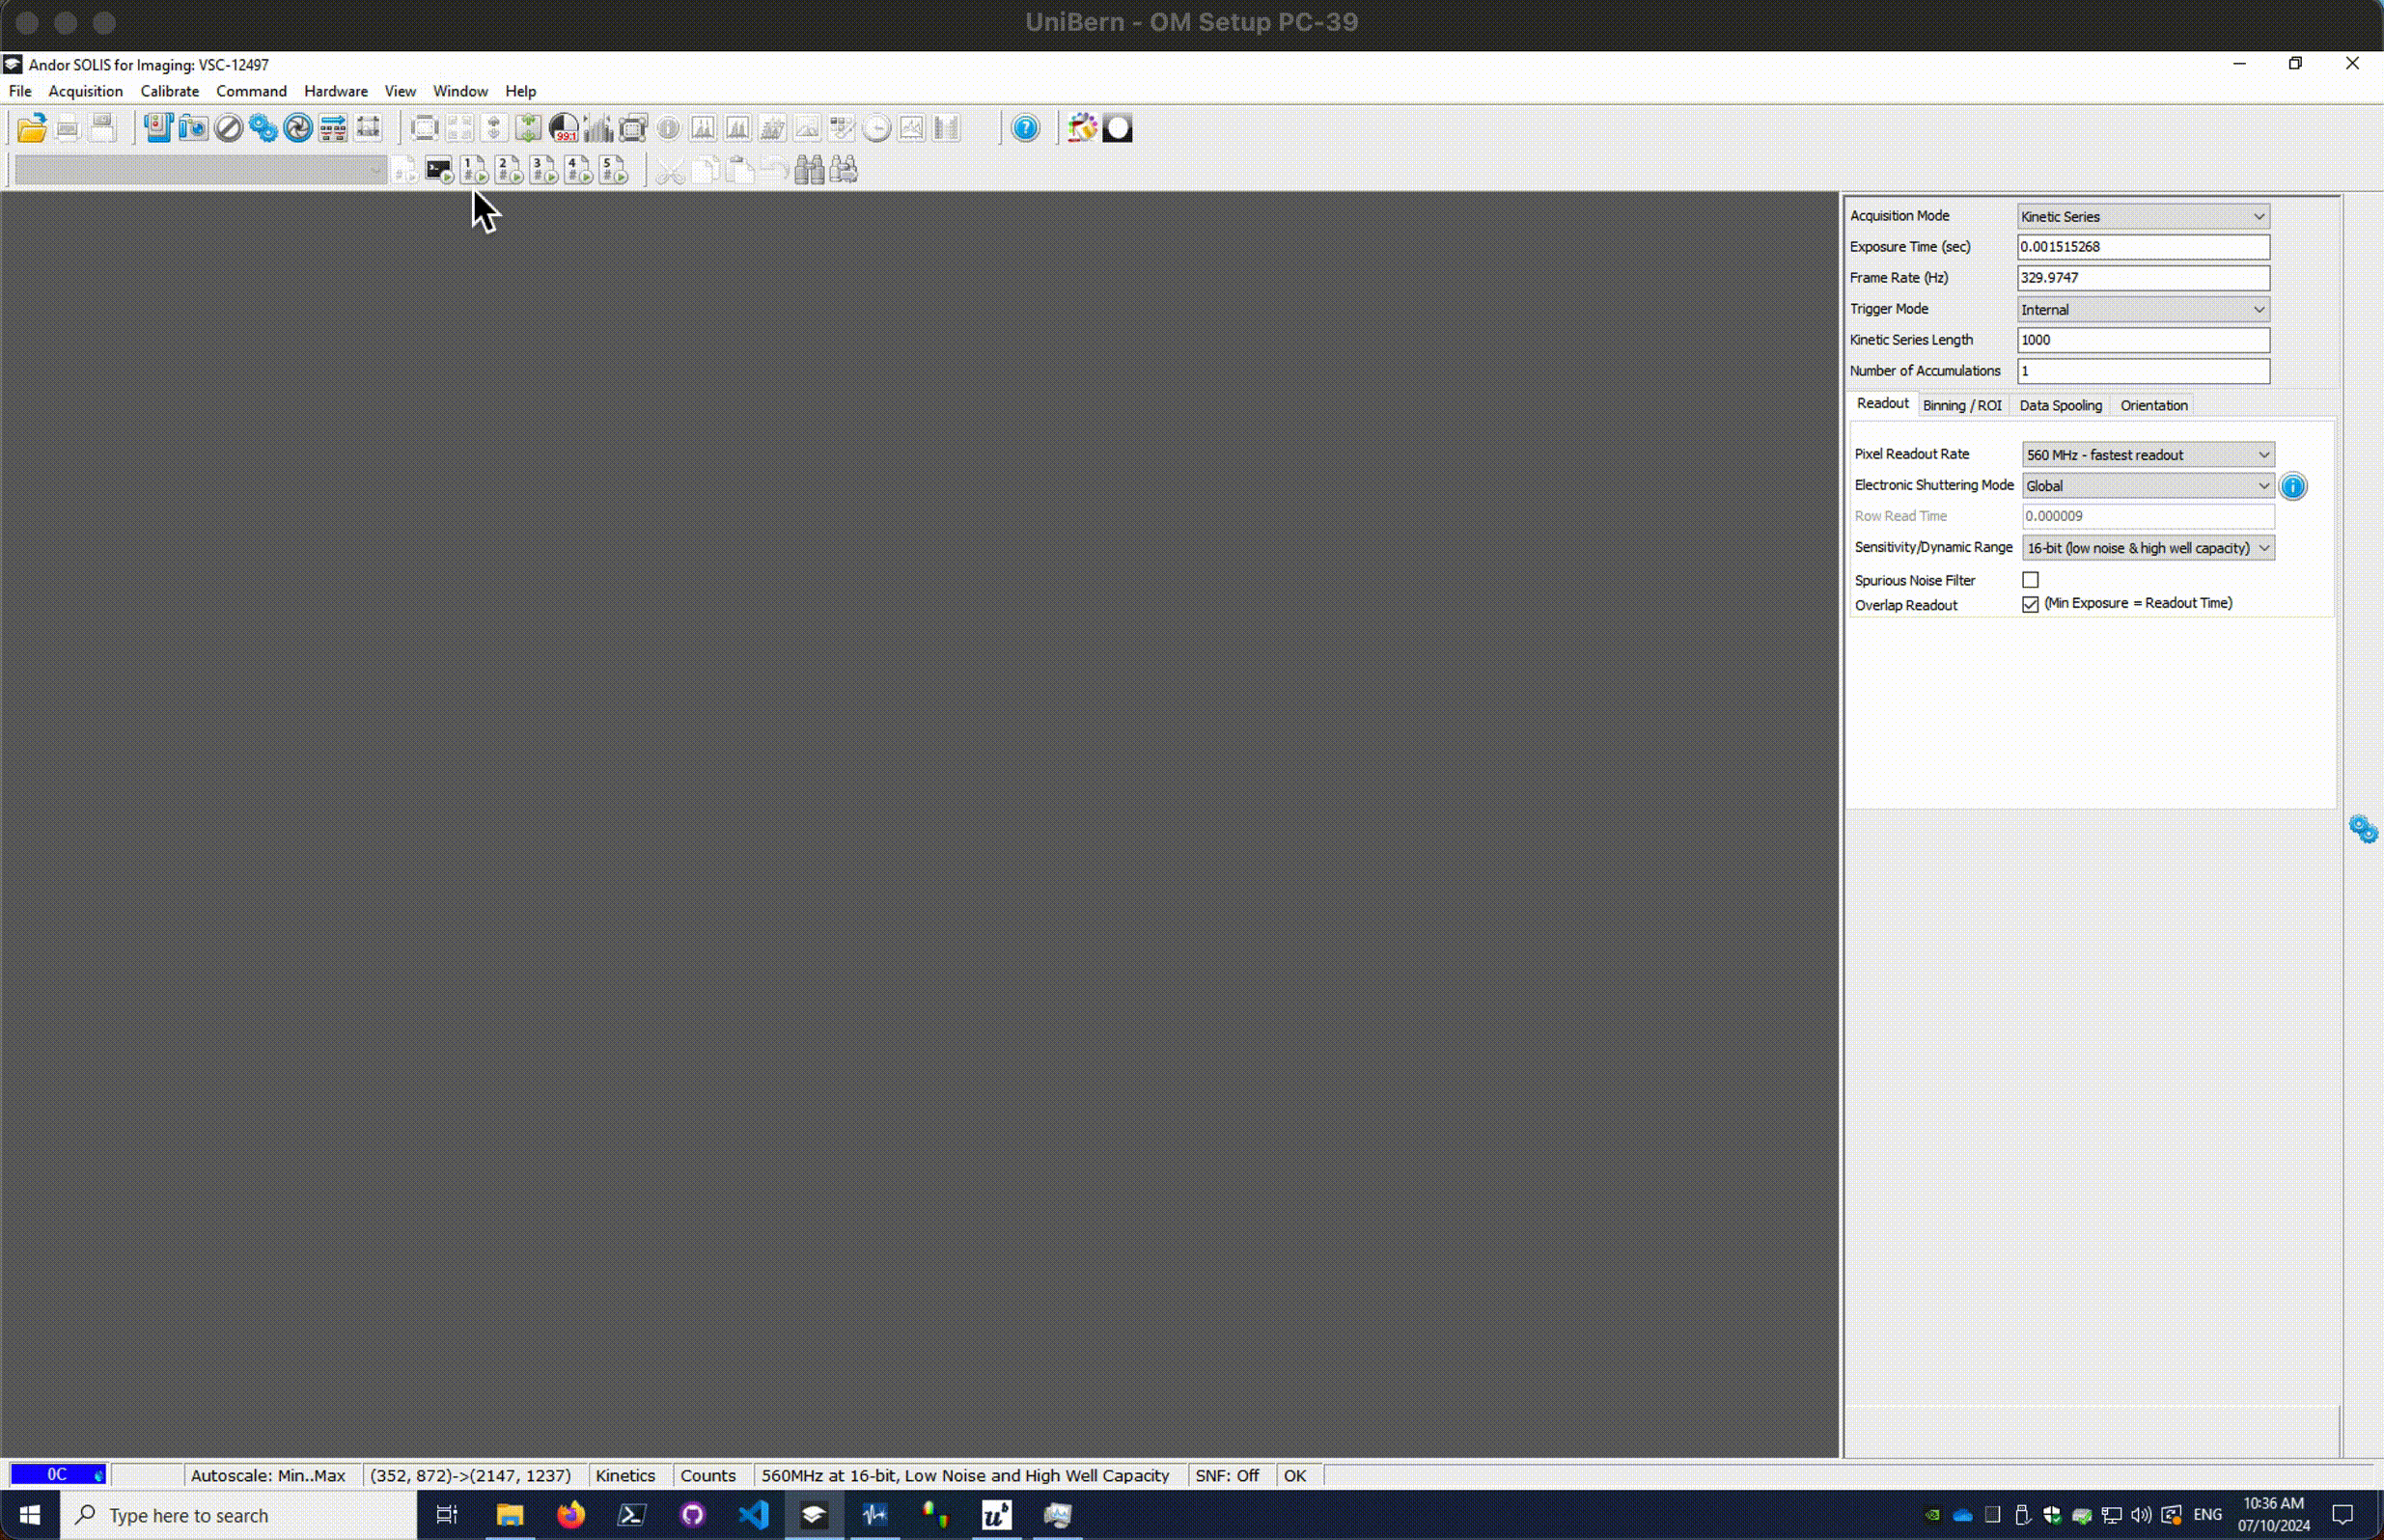
Now lets have a look at the configuration of the camera to receive the triggering signal.
If you have previously loaded a configuration file, you will find a number of macros availables as display bellow. Those are needed to facilitate the acquisiton via external triggering.
🔨 Work in progress
This tutoriasl is under construction. Soon will be updated.